Problem: Need to quickly create a copy of a complete dataflow from extractor to cube.
Understand The SAP BW 7.3 Dataflow
Background: The dataflow in this case is the master dataflow template created for a real life project that contained the most important dataset (table AFRU with some custom supporting tables) for company operational cost reporting. Every possible field is included in this data model.
In order to create other data models or more highly aggregated data models, a copy of this template data flow can be created and fields removed easily rather than adding. In this particular example, we have to merge data from another table that will cause the main table’s records to be duplicated for each occurrence in the new table. This is for one report and the other deliverables have already been developed. This method will avoid having to redesign all the existing reports and will prevent degradation of performance on those reports due to the additional data.
System: SAP BW 7.3
Source System: SAP ECC 6.0

Right click on the top object of the dataflow - in this case an InfoCube. Select “Copy Data Flow” from the context menu.

The following screen appears prompting for the start object and dataflow direction. Select continue (green check mark).

The following screen appears. Select “Yes” to collect all the objects to be copied.
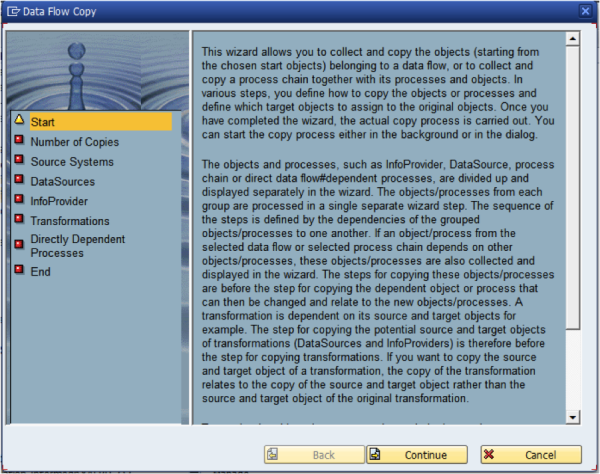
The data flow copy wizard screen appears. Read through the documentation for a full understanding of the tool. Click “Continue” to start.
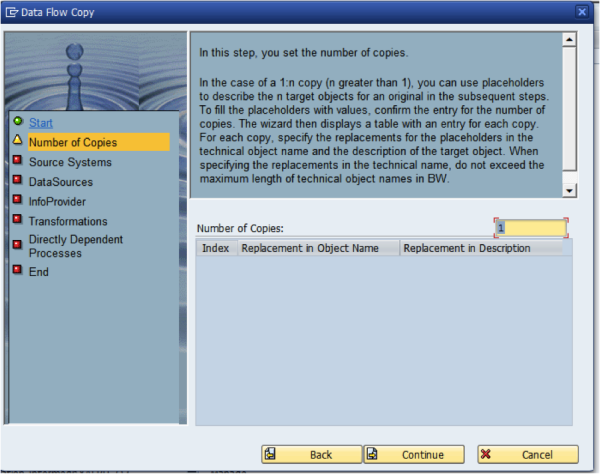
In the first screen, we will enter the number of copies to be created. This is handy, for example, in the case that you want to physically segregate data in a cube into say years and then report off it from a multicube on top of these copies. Click “Continue”.
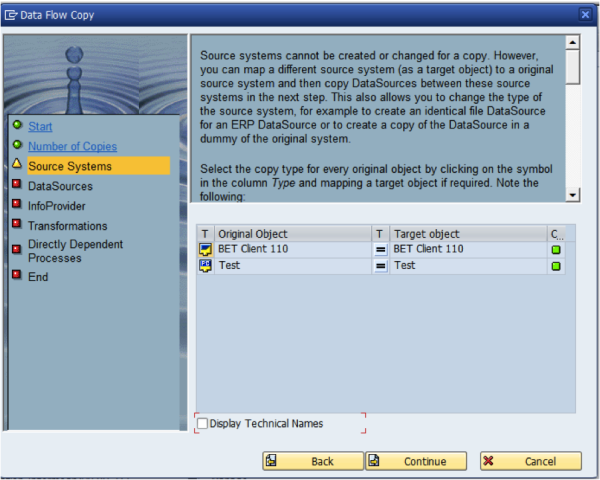
In the next screen, we can define the source system to be used for the new objects if any. In this case, we are extracting from the same source system so we leave it as “=”. You could use this step to redirect a copy to a new source system or second source system. Click “Continue”.
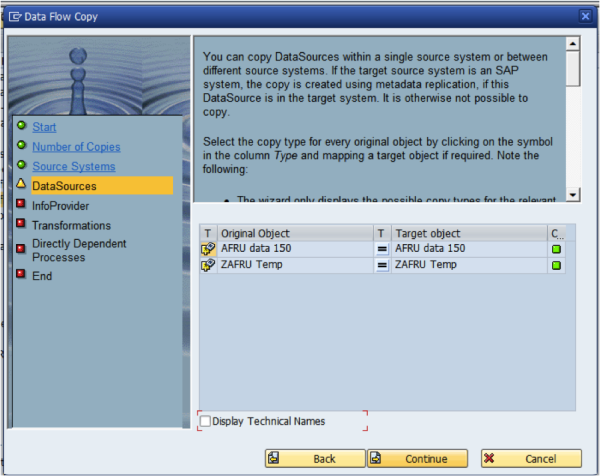
In this screen, we define the datasource to be used or copied to. Click “Continue”.
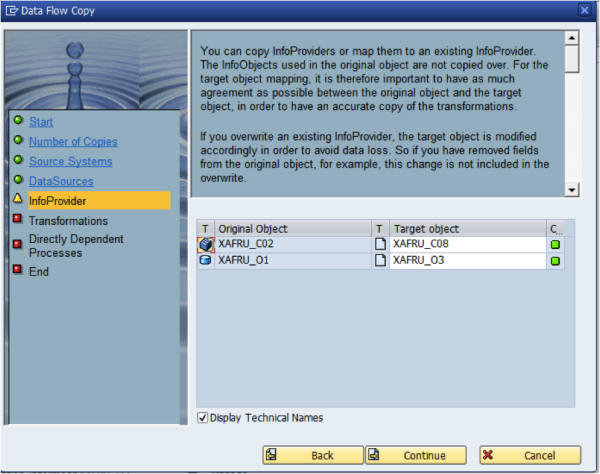
In the InfoProvider screen, we specify what to do with the InfoProviders. In this case, we want to create new copies. We change the middle icon to the new option and give the proposed names for the new objects. Click “Continue”.
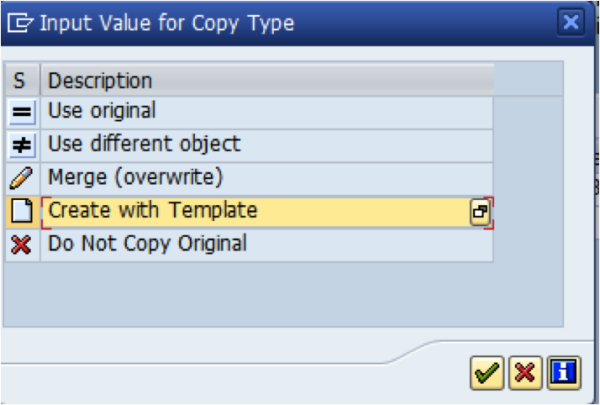
Copy type options. In this case “Create with Template”.
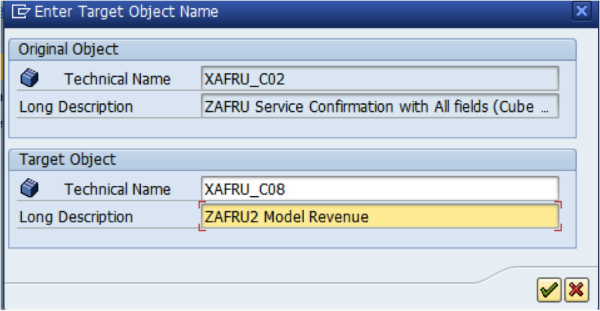
Define new technical name and description.
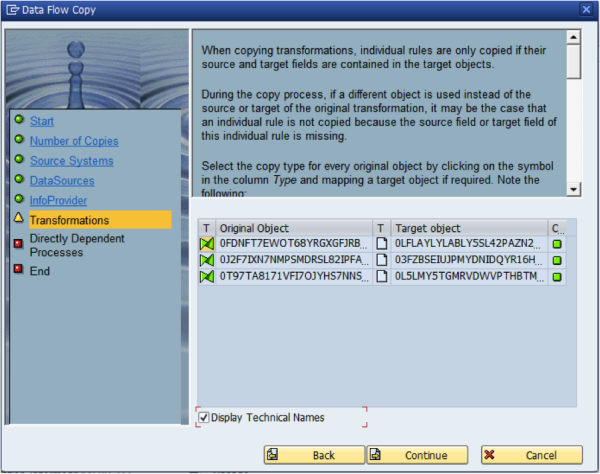
In the Transformations step, we define how to duplicate the transformations. Create with template is what we are using here. Click “Continue”.
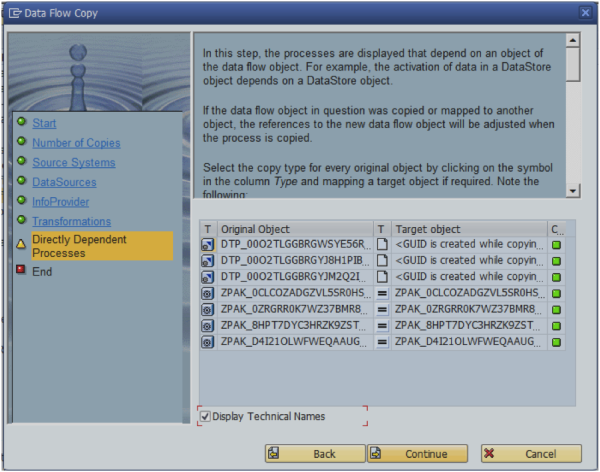
In this step, we define the copy type and target object for other dependent objects such as DTP’s and Infopackages. In this example, we will create new with template for the DTP’s and reutilize the same infopackages for data loading. We don’t want to load data twice if we don’t have to for data load performance.
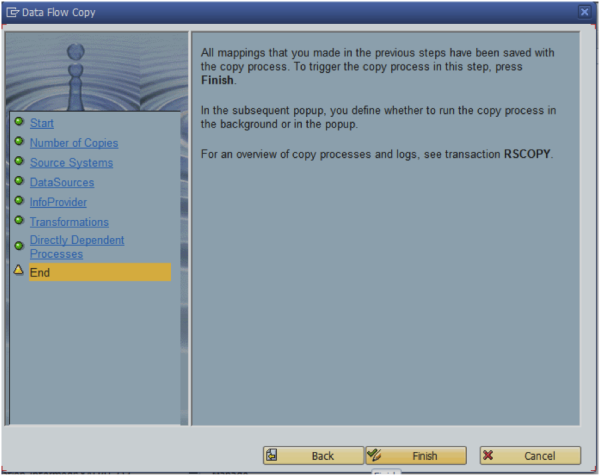
Click “Finish” on the final screen.
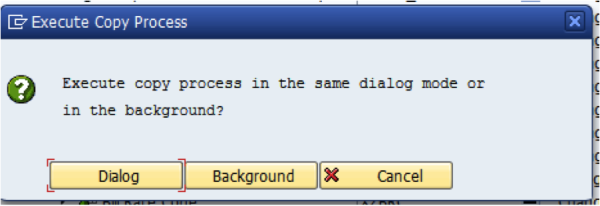
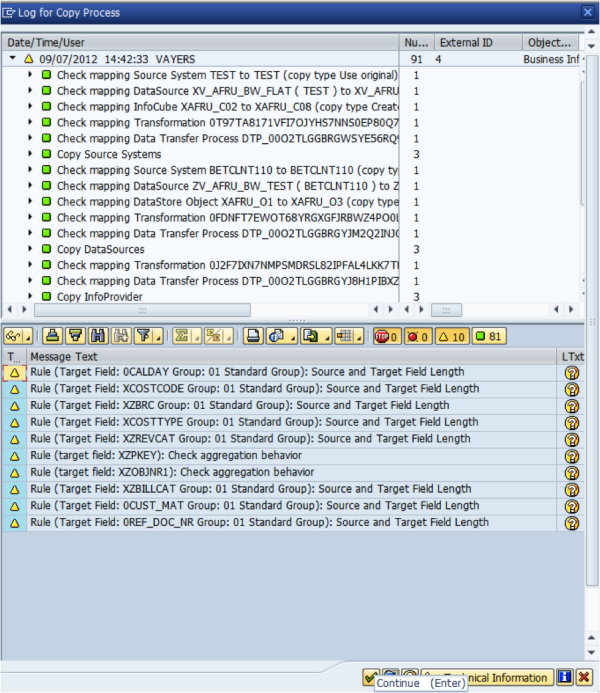
The execute copy process screen appears, select your preference for running the copy process. Select “Dialog” if you want to keep an eye on things while the copy process runs.
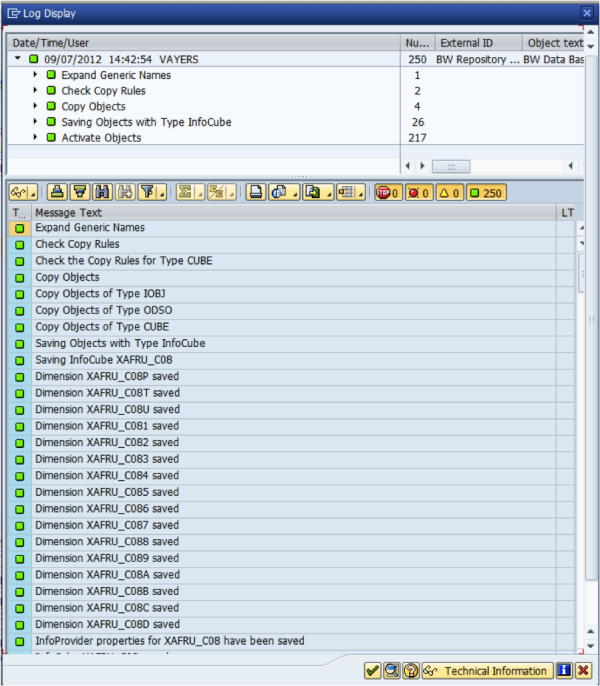
After the copy process runs, the log display appears. Here, the InfoCube has been copied. Click “green checkmark” to cotinue.
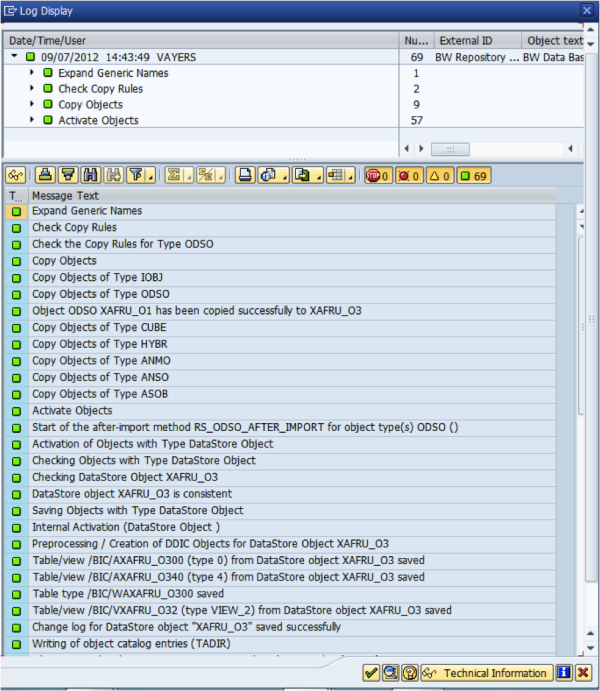
The next log to display is for our copied DSO. Click the “green checkmark” to continue.
In the final log we see the results of the transformation, DTP and other objects copy process. Click the “green checkmark” to continue. The dataflow will now appear in your workbench.
Vastly Improved SAP BW Dataflow Workflow
For this particular example, we continued by switching the extractor used for the DSO (a similar one but with a view joining another table). We will make some modifications to the transformations as required and remove unneeded characteristics from the InfoCube. Our final step is to create our report deliverable.
According to the screenshot timestamps, this entire copy process took 17 minutes. In the past, we would have to copy each object individually with the single object copy command. The old method could have taken us anywhere from an hour to a half day.
That's quite a few complex steps. We've decided to make this into a downloadable document so you can have for future reference. If you want to get your copy, just click the button.

Readers Who Read This Also Read:
- 1 Key Tip When Upgrading from SAP BW 3X to 7X
- 10 Advanced SAP BW Project Estimation Techniques
- Analyzing and Estimating a SAP Webi Project
- Avoid SAP Webi Design Mistakes
